
Hexo博客搭建
基础安装
1.环境与工具准备
本教程主要面对的是Windows用户
- 操作系统:Windows11
- Node
- Git
- Hexo
- 文本编辑器(强烈推荐VSCODE)
- GitHub 帐号
- 一个域名(强烈推荐买个域名)
- 云服务器(可选)
2. Node的安装
打开Node官网,下载和自己系统相配的Node的安装程序,否则会出现安装问题。下载地址:https://nodejs.org/en/download/
我个人的版本是 12.19.0,目前版本已经更新到19.0.0,按照个人经验,可以选个低一些的版本,可以和我的一样,否则后面会出现各种不兼容的问题!我之前就是安装16的,系统无法识别,如果大家遇到问题建议选个低版本的!历史版本下载页面:https://nodejs.org/en/download/releases/(下载建议下载.msi文件 直接安装)
下载后安装,安装的目录可以使用默认目录【C:/Program Files/nodejs/】,也可以自定义路径。
这个环境路径切换坑也很多,如果大家C盘空间足够可以直接装C盘,如果想切换其他盘或者把环境遍历切换到自定义路径也可以,具体教程百度(不过坑比较多就是了)!安装完成后,检查是否安装成功。在键盘按下win + R键,输入CMD,然后回车,打开CMD窗口,执行node -v命令,看到版本信息,则说明安装成功。
修改npm源。npm下载各种模块,默认是从国处服务器下载,速度较慢,建议配置成淘宝镜像。打开CMD窗口,运行如下命令:
1 | npm config set registry https://registry.npm.taobao.org |
3.Git安装
进入官网:https://git-scm.com/downloads ,由于官网下载太慢可以通过淘宝的开源镜像下载 网址:https://registry.npmmirror.com/binary.html?path=git-for-windows/v2.36.1.windows.1/ ,下载版本更具自己的需求选择即可。
下载后傻瓜式安装Git即可,安装的目录可以使用默认目录【C:/Program Files/Git】,也可以自定义路径。
点击电脑左下角开始即可看见
Git Bash。Git CMD是windows 命令行的指令风格Git Bash是linux系统的指令风格(建议使用)Git GUI是图形化界面(新手学习不建议使用)
常用命令
1
2
3
git config -l //查看所有配置
git config --system --list //查看系统配置
git config --global --list //查看用户(全局)配置配置用户名和邮箱
1
2
git config --global user.name "你的用户名"
git config --global user.email "你的邮箱"通过
git config -l检查是否配置成功,至此git安装及配置全部完成。
4.Github注册与创建仓库
进入官网 https://github.com

点击右上角的 Sign up(注册)
填写自己的邮箱、密码、用户名等信息,然后用邮箱验证即可完成。
注册完成后,点击右上角的
+按钮,选择New repository,创建一个<用户名>.github.io的仓库。- 仓库的格式必须为:
<用户名>.github.io(注意:前缀必须为用户名,不要等后面404了再来为什么!!!) - Description:为描述仓库(选填)
- 勾选 Initialize this repository with a README 初始化一个 README.md 文件
- 点击 Creat repository 进行创建
- 仓库的格式必须为:
5. 连接到github
执行以下命令生成ssh公钥,此公钥用于你的计算机连接Github
1
ssh-keygen -t rsa -C "你的邮箱"
之后打开C盘下用户文件夹下的.ssh的文件夹,会看到 id_rsa.pub

用记事本打开上述图片中的公钥(id_rsa.pub),复制里面的内容,然后开始在github中配置ssh密钥。
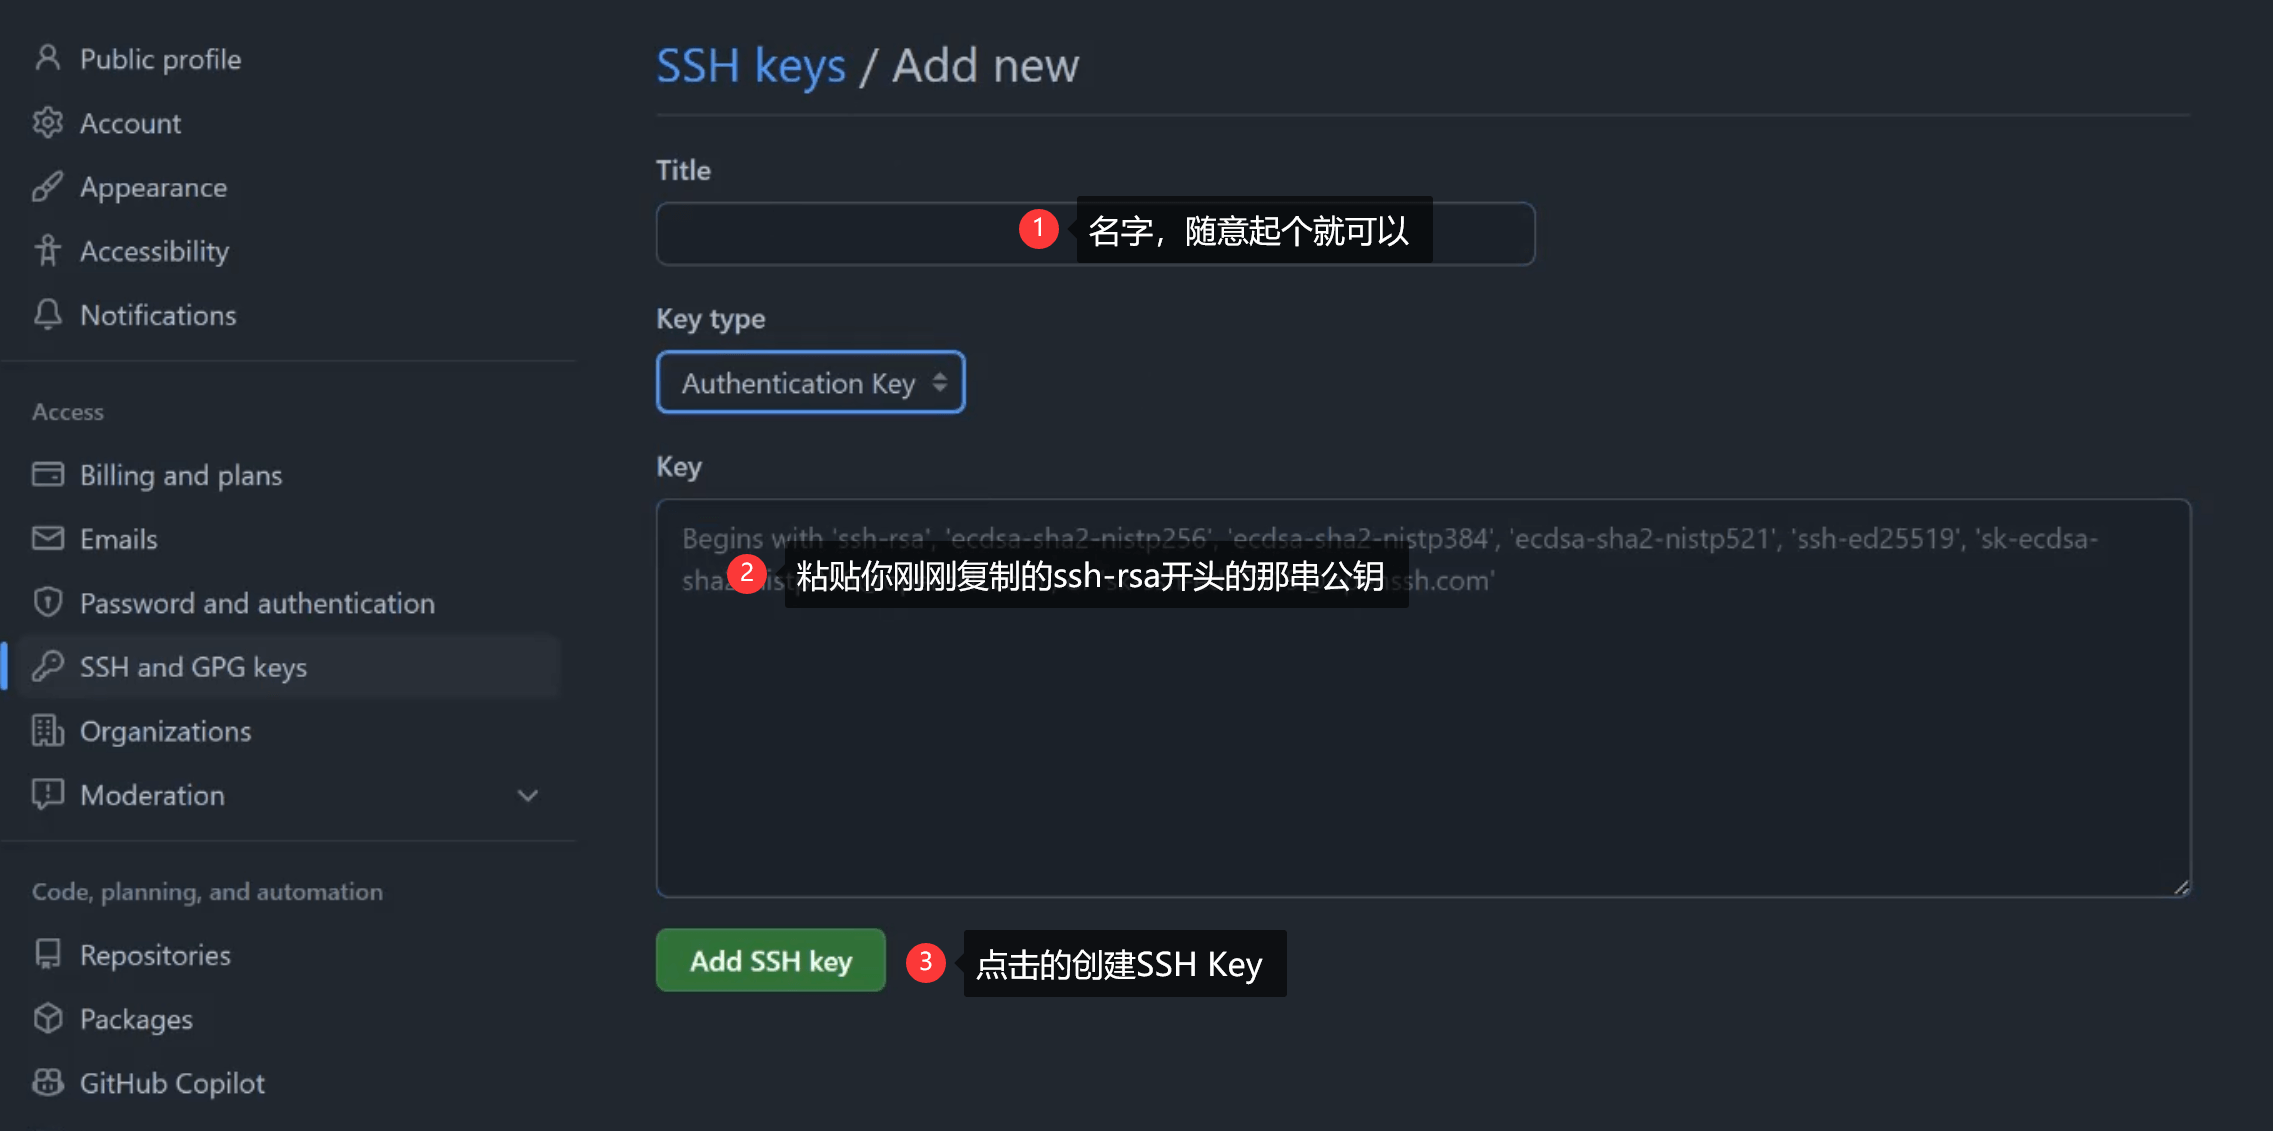
将 SSH KEY 配置到 GitHub
进入github,点击右上角头像 选择
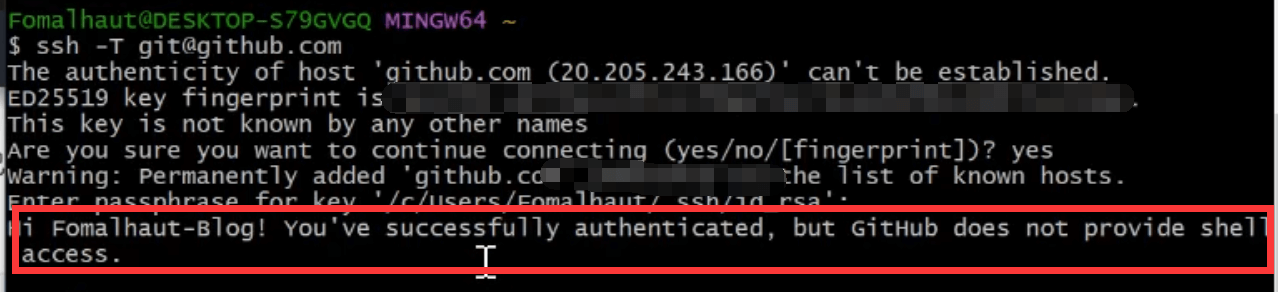
settings,进入设置页后选择SSH and GPG keys,名字随便起,公钥填到Key那一栏。测试连接,输入以下命令
1
ssh -T git@github.com
出现连接到账户的信息,说明已经大功告成,至此完成了环境准备工作。
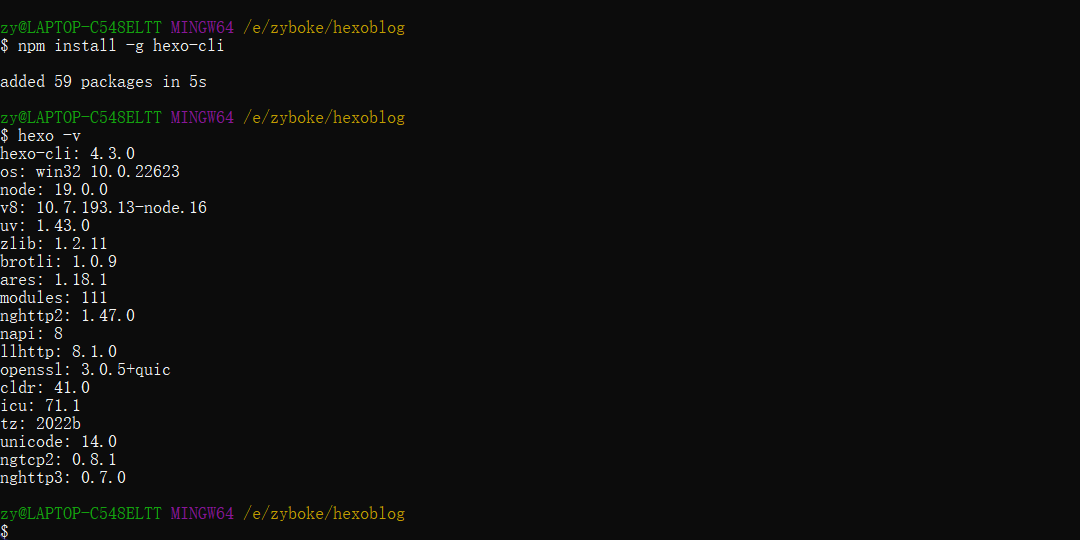
6 安装Hexo
在
Git BASH输入如下命令安装1
npm install -g hexo-cli
安装完后输入hexo -v验证是否安装成功。
7. 初始化 Hexo 项目
在目标路径(我这里选的路径为【E:\zyboke\hexoblog】)打开cmd命令窗口,执行
hexo init初始化项目。1
hexo init blog(项目名)
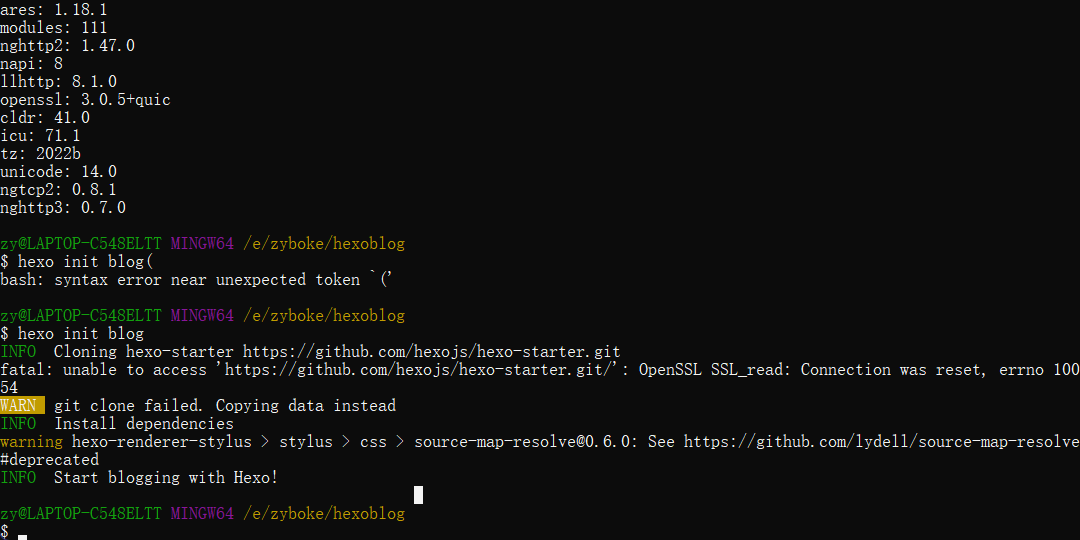
出现 INFO Start blogging with Hexo!则成功
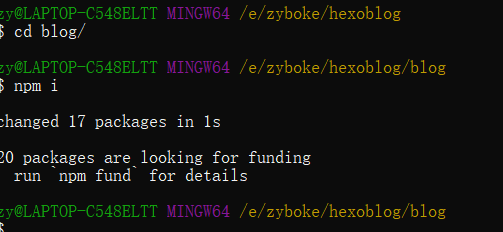
- 进入
blog,输入npm i安装相关依赖。
1 | cd blog //进入blog文件夹 |
- 初始化项目后,
blog-demo有如下结构:
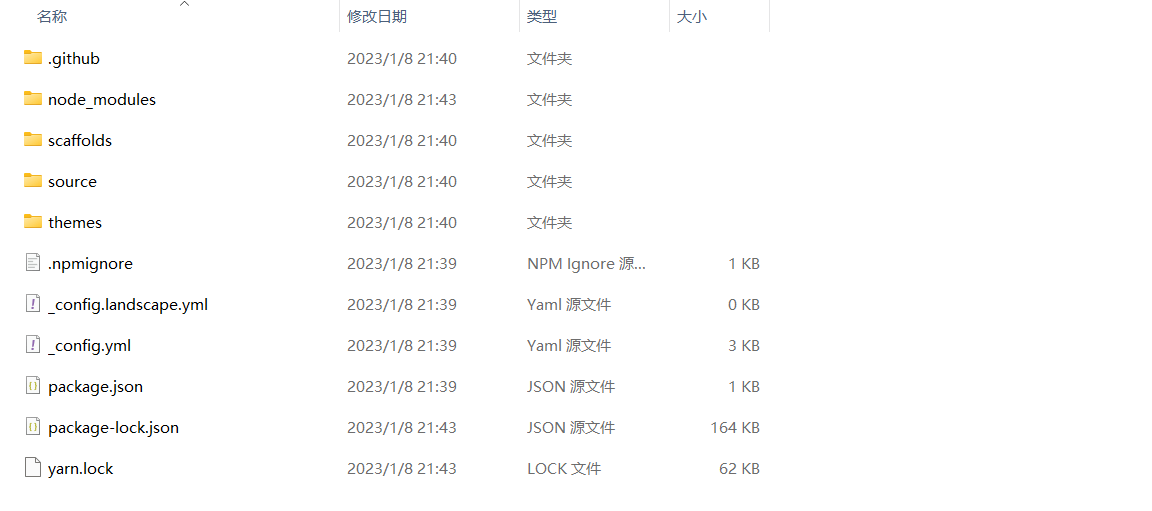
【node_modules】:依赖包
【scaffolds】:生成文章的一些模板
【source】:用来存放你的文章
【themes】:主题
【.npmignore】:发布时忽略的文件(可忽略)
【_config.landscape.yml】:主题的配置文件
【config.yml】:博客的配置文件
【package.json】:项目名称、描述、版本、运行和开发等信息
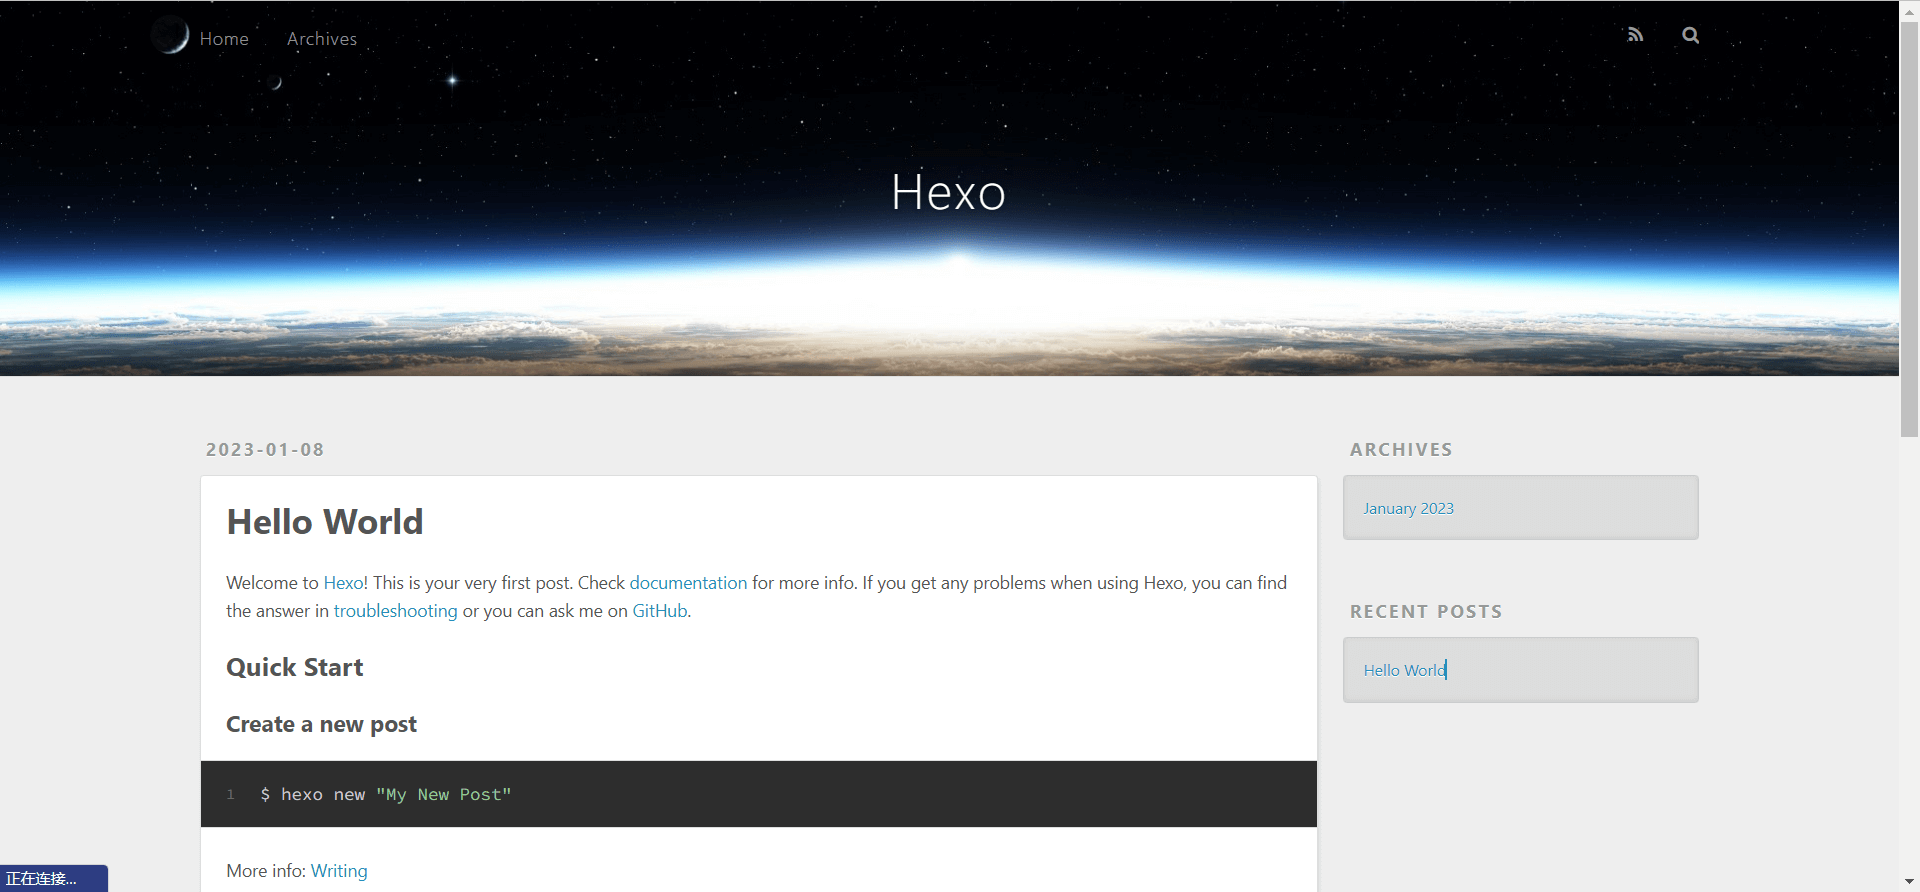
- 输入hexo server或者hexo s 启动项目
- 打开浏览器,输入地址:http://localhost:4000/,看到下面的效果,说明你的博客已经构建成功了。
8. 将静态博客挂载到 GitHub Pages
- 安装 hexo-deployer-git
1 | npm install hexo-deployer-git --save |
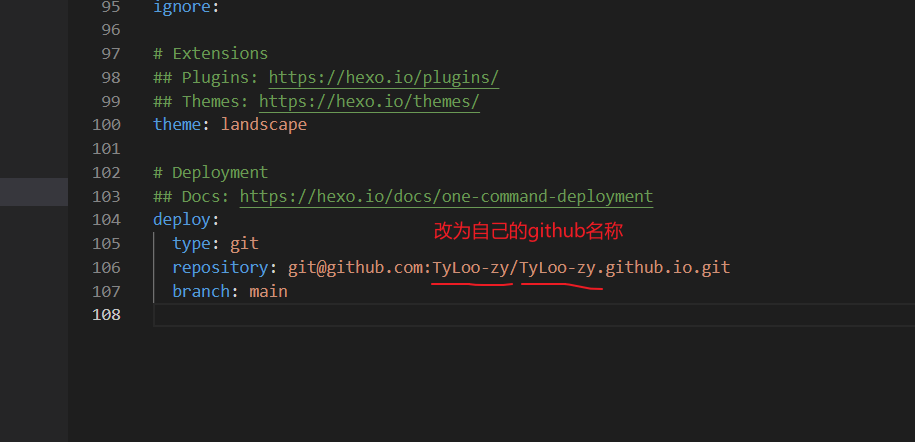
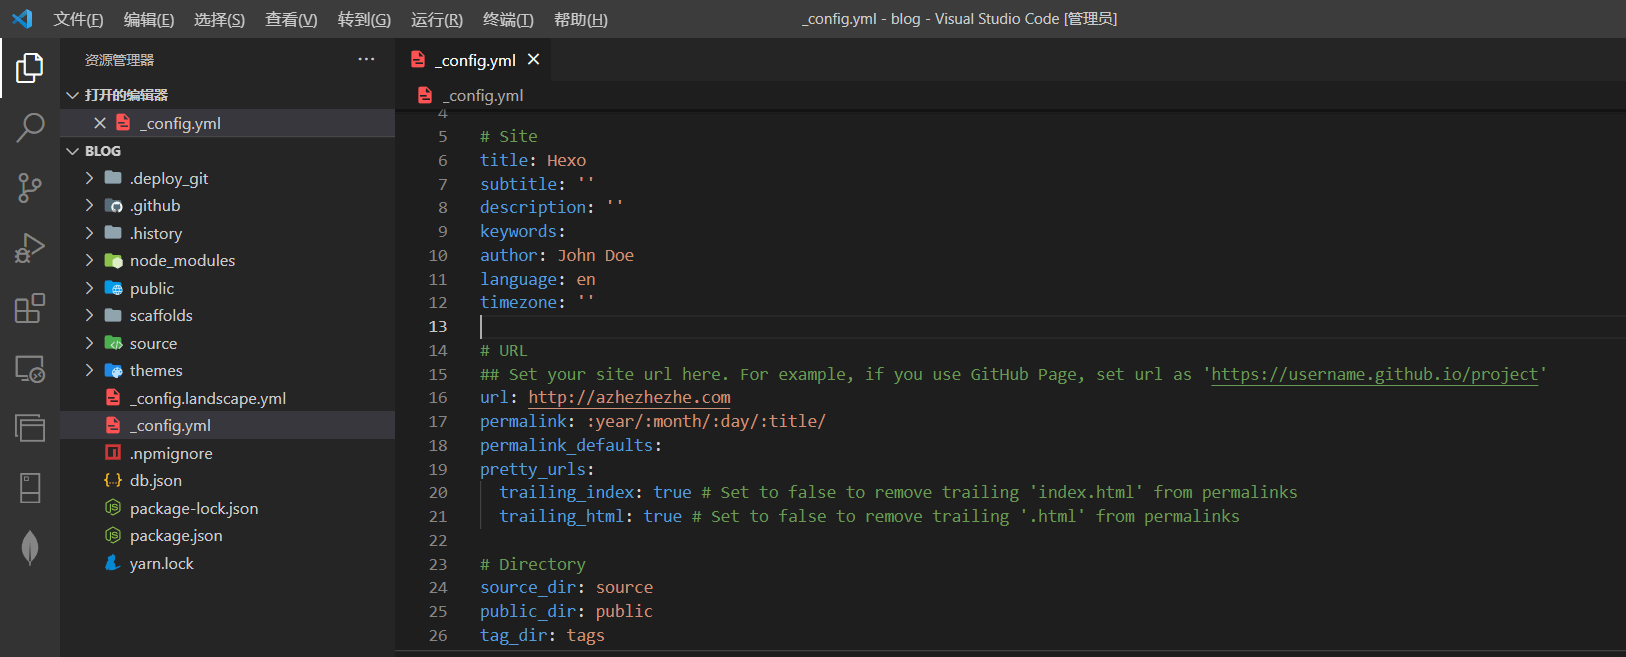
- 修改 _config.yml 文件
在blog-demo目录下的_config.yml,就是整个Hexo框架的配置文件了。可以在里面修改大部分的配置。详细可参考官方的配置描述。
修改最后一行的配置,将repository修改为你自己的github项目地址即可,还有分支要改为 main代表主分支(注意缩进)。
1 | deploy: |
- 修改好配置后,运行如下命令,将代码部署到 GitHub(Hexo三连)。
1 | hexo clean && hexo generate && hexo deploy // Git BASH终端 |
- hexo clean:删除之前生成的文件,若未生成过静态文件,可忽略此命令。
- hexo generate:生成静态文章,可以用
hexo g缩写 - hexo deploy:部署文章,可以用
hexo d缩写
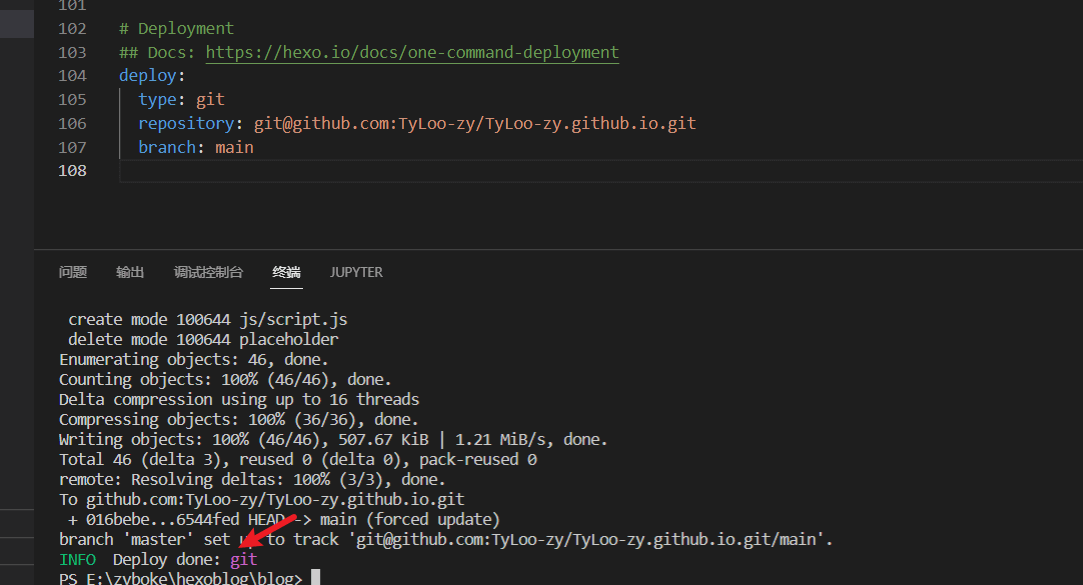
出现这一句即为上传成功
注意:deploy时可能要你输入 username 和 password。
稍等两分钟,打开浏览器访问:https://zboyzy.github.io 注意更改为自己的GitHub名称,这时候我们就可以看到博客内容了。
9. 无法连接至Github的解决方法
注意:当你在与Github进行ssh通信时候出现超时或者是连接被关闭的情况,可以尝试以下解决方案。
挂代理和换网络(这个就不用多说了)
Git问题:解决“ssh:connect to host github.com port 22: Connection timed out”
这是评论区的朋友提供的,可以解决SSH连接超时等问题
开源项目Github520
通过修改Host文件的方法解决访问速度慢的问题
连接有效性检验:
1 | # 任选其一即可 |
vercel部署以及更换主题
1.Vercel部署与自定义域名
1.1 Vercel部署
Vercel简介:vercel是一个代码托管平台,它能够托管你的静态html界面,甚至能够托管你的node.js与Python服务端脚本,是不想买服务器的懒人的福音!
使用Vercel部署Hexo项目步骤:
- 首先需要一个Vercel账号,这里推荐用GitHub账户关联,这样你就可以在vercel中直接托管你的GitHub库中的项目了,实现开发部署一步到位(网络不流畅可以考虑挂梯子)。
- 当你用你的Github账户关联并绑定手机号登录之后,点击右上角的
Add New Project创建新的项目,之后导入选项那里选择Continue with Github,这时候应该能看到你Github账号的仓库,选择你刚刚部署成功的存储静态博客的仓库<username>.github.io右边的Import选项,表示你要导入该仓库。 - 起一个只能有字母、数字或者或者连字符的项目名称,然后其他默认,点击
Deploy,等待一分钟即可部署成功,部署成功后电极Continue to Dashboard跳转到控制面板,下图所示就是控制面板,看到就代表成功部署到了,但是我们现在还不能访问他给出的域,因为GFW最近把Vercel屏蔽了。
1.2自定义域名
现在你的个人网站的地址是 username.github.io以及在Vercel上有一个 blog-demo.vercel.app。如果觉得不够定制化,可以购买一个专属域名。
这一步不是必要的,如果目前还不想买域名可以先跳过。
腾讯云、阿里云等都是不错的域名代理商,建议选用 com,cn或 cc这类常用好记的顶域,对SEO比较友好,自定义部分的长度尽可能短别人才会更容易地记住你的网站,要知道域名就是你网站的卡片。此处以阿里云域名为例进行说明,购买域名后,实名认证进入阿里云控制台,点云解析进去,找到你刚买的域名,点进去添加Vercel所需的解析记录,注意博主这里是解析二级域名只需要解析一条即可。但是如果是一级域名,需要解析两个,一个是 @,另外一个是 www,Vercel建议是 @的解析重定向至 www。
以我的域名:aboyzy.com为例进行说明
| 主机记录 | 解释 |
|---|---|
| www | 解析后的域名为www.aboyzy.com |
| @ | 直接解析主域名aboyzy.com |
| * | 泛解析,匹配其他所有域名 *.aboyzy.com |
| 将域名解析为mail.aboyzy.com,通常用于解析邮箱服务器 | |
| 二级 | 如abc.aboyzy.com,填写 abc |
| 手机网站 | 如m.aboyzy.com,填写 m |
| 显性URL | 不支持泛解析(泛解析:将所有子域名解析到同一地址) |
将域名指向云服务器,请选择「A」; 将域名指向另一个域名,请选择「CNAME」; 建立邮箱请选择「MX」,根据邮箱服务商提供的 MX 记录填写。
| 记录类型 | 解释 |
|---|---|
| A | 用来指定域名的 IPv4 地址(如 8.8.8.8),如果需要将域名指向一个 IP 地址,就需要添加 A 记录。 |
| CNAME | 如果需要将域名指向另一个域名,再由另一个域名提供 IP 地址,就需要添加 CNAME 记录。 |
| MX | 如果需要设置邮箱,让邮箱能收到邮件,就需要添加 MX 记录。 |
| TXT | 在这里可以填写任何东西,长度限制 255。绝大多数的 TXT 记录是用来做 SPF 记录(反垃圾邮件) |
| NS | 域名服务器记录,如果需要将子域名交给其他 DNS 服务商解析,就需要添加 NS 记录。 |
| AAAA | 用来指定主机名(或域名)对应的 IPv6 地址(例如:ff06:0:0:0:0:0:0:c3)记录。 |
| SRV | 记录了哪台计算机提供了哪个服务。格式为:服务的名字、点、协议的类型,例如:_xmpp-server_tcp。 |
| 显性URL | 从一个地址 301 重定向到另一个地址的时候,就需要添加显性 URL 记录(注:DNSPod 目前只支持 301 重定向)。 |
| 隐性URL | 类似于显性 URL,区别在于隐性 URL 不会改变地址栏的域名。 |
添加自定义域名的步骤:
点击Vercel控制面板右上角的
View Domains查看当前的域,我们可以看到仅有Vercel给你预分配的一个域名,此时我们输入刚刚购买的域名,我这里以一级域名aboyzy.com为例进行说明,添加后他会提示你添加两条DNS解析记录。(二级域名为一个)PS:如果你是新买的域名,直接输入你新买的一级域名即可,例如
aboyzy.com,他会推荐你将aboyzy.com重定向至www.aboyzy.com,点ADD即可,然后他会提示你添加两条解析记录,一个是@开头的和CNAME开头的,添加记录的方法和二级域名一致。在腾讯云域名解析记录里面添加如下记录,其中记录类型对应
Type,主机记录对应Name,记录值对应Value,其他的设置默认即可。回到Vercel刚刚查看域名的地方,如果操作没问题,应该会显示域名配置成功的提示,此时就可以通过自定义域名来访问我们搭建的网站了。
当你有了新的域名之后,需要
[BlogRoot]\_config.yml文件中的url配置项为自己的新域名,这样博客的文章链接才会正确生成。
2. 安装主题
本教程用的 🦋 hexo-theme-butterfly 主题 v4.5.1.
如果用的是npm方式安装的 hexo-theme-butterfly,更改的文件都是【C:/Hexo-Blog/blog-demo/node_modules/hexo-theme-butterfly】文件夹中的文件。如果是 git clone克隆方式安装的主题,请在【C:/Hexo-Blog/blog-demo/themes/butterfly】文件夹下修改对应的文件。
注意:此方法只支持 Hexo 5.0.0以上版本!
在你的博客根目录(我这里路径为【E:\zyboke\hexoblog\blog】)打开 Git BASH命令窗口执行 npm i hexo-theme-butterfly
1 | npm i hexo-theme-butterfly |
安装成功后可在【E:/zyboke/hexoblog/blog/node_modules】文件夹下找到hexo-theme-butterfly文件夹
升级方法:在博客根目录下,运行 npm update hexo-theme-butterfly。
升级前请将 hexo-theme-butterfly文件夹备份,npm更新会直接覆盖成新的包。
在你的博客根目录里(我这里路径为【E:\zyboke\hexoblog\blog】),打开 Git BASH工具,执行命令即可。
1 | git clone -b 4.5.0 https://github.com/jerryc127/hexo-theme-butterfly.git themes/butterfly |
安装成功后可在【E:\zyboke\hexoblog\blog\themes】文件夹下找到 butterfly文件夹,可以将 landscape文件夹删掉。
升级方法:在主题目录下,运行git pull
应用主题
修改站点配置文件
_config.yml,把主题改为butterfly1
theme: butterfly
如果你没有
pug以及stylus的渲染器,请下载安装,这两个渲染器是Butterfly生成基础页面所需的依赖包:1
npm install hexo-renderer-pug hexo-renderer-stylus --save
为了减少升级主题后带来的不便,请使用以下方法(建议,可以不做,高度魔改的一般都不会升级主题了,不然魔改的会被覆盖掉)
把主题文件夹【E:\zyboke\hexoblog\blog\node_modules\hexo-theme-butterfly】中的_config.yml复制到 Hexo 根目录里【E:\zyboke\hexoblog\blog】,同时重新命名为_config.butterfly.yml。以后只需要在_config.butterfly.yml进行配置即可生效。Hexo会自动合併主题中的_config.yml和_config.butterfly.yml里的配置,如果存在同名配置,会使用_config.butterfly.yml的配置,其优先度较高。
主题配置
1.网站资料配置
在 _config.yml 的最上边位置为基础配置
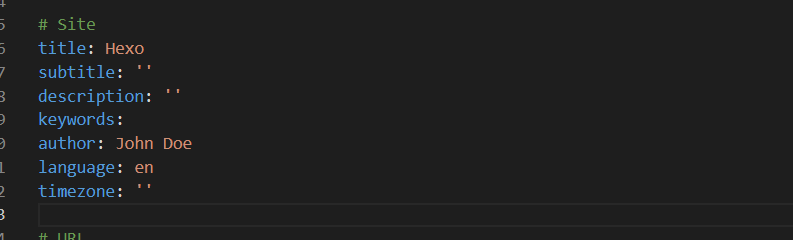
| 参数 | 描述 |
|---|---|
| title | 网站标题 |
| subtitle | 描述 |
| description | 网站描述 |
| keywords | 网站的关键词。支持多个关键词 |
| author | 您的名字 |
| language | 网站使用的语言。对于简体中文用户来说,使用不同的主题可能需要设置成不同的值,请参考你的主题的文档自行设置,常见的有 zh-Hans和 zh-CN。 |
| timezone | 网站时区。Hexo 默认使用您电脑的时区。请参考 时区列表 进行设置,如 America/New_York, Japan, 和 UTC 。一般的,对于中国大陆地区可以使用 Asia/Shanghai |
网站副标题
可设置主页中显示的网站副标题或者喜欢的座右铭。
修改主题配置文件 _config.butterfly.yml中的 subtitle
1 | # the subtitle on homepage (主頁subtitle) |
2.导航菜单配置
配置菜单
修改主题配置文件 _config.butterfly.yml
1 | menu: |
- 前边是路径 ,后边是引用的图标
- 必须是
/xxx/,后面||分开,然后写图标名,如果不想显示图标,图标名可不写 - 文字可自行更改,中英文都可以
1 | menu: |
其中 archives自带其他需要创建
我们分别执行生成包
1 | hexo new page "tags" |
会生成一个含有 index.md文件的文件夹。
分别编辑文件夹
tags
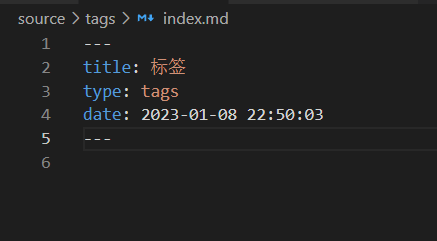
1 | --- |
categories
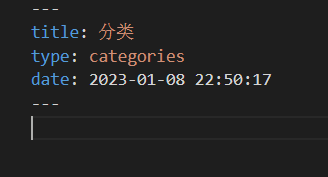
1 | --- |
其他只需更改title内容
说明
Front-matter
Front-matter 是 markdown 文件最上方以 ---分隔的区域,用于指定个别档案的变数。
- Page Front-matter 用于页面配置
- Post Front-matter 用于文章页配置
如果标注可选的参数,可根据自己需要添加,不用全部都写
Page Front-matter:
1 | --- |
| 写法 | 解释 |
|---|---|
| title | 【必需】页面标题 |
| date | 【必需】页面创建日期 |
| type | 【必需】标籤、分类和友情链接三个页面需要配置 |
| updated | 【可选】页面更新日期 |
| description | 【可选】页面描述 |
| keywords | 【可选】页面关键字 |
| comments | 【可选】显示页面评论模块(默认 true) |
| top_img | 【可选】页面顶部图片 |
| mathjax | 【可选】显示mathjax(当设置mathjax的per_page: false时,才需要配置,默认 false) |
| kates | 【可选】显示katex(当设置katex的per_page: false时,才需要配置,默认 false) |
| aside | 【可选】显示侧边栏 (默认 true) |
| aplayer | 【可选】在需要的页面加载aplayer的js和css,请参考文章下面的音乐 配置 |
| highlight_shrink | 【可选】配置代码框是否展开(true/false)(默认为设置中highlight_shrink的配置) |
Post Front-matter:
1 | --- |
| 写法 | 解释 |
|---|---|
| title | 【必需】文章标题 |
| date | 【必需】文章创建日期 |
| updated | 【可选】文章更新日期 |
| tags | 【可选】文章标籤 |
| categories | 【可选】文章分类 |
| keywords | 【可选】文章关键字 |
| description | 【可选】文章描述 |
| top_img | 【可选】文章顶部图片 |
| cover | 【可选】文章缩略图(如果没有设置top_img,文章页顶部将显示缩略图,可设为false/图片地址/留空) |
| comments | 【可选】显示文章评论模块(默认 true) |
| toc | 【可选】显示文章TOC(默认为设置中toc的enable配置) |
| toc_number | 【可选】显示toc_number(默认为设置中toc的number配置) |
| toc_style_simple | 【可选】显示 toc 简洁模式 |
| copyright | 【可选】显示文章版权模块(默认为设置中post_copyright的enable配置) |
| copyright_author | 【可选】文章版权模块的文章作者 |
| copyright_author_href | 【可选】文章版权模块的文章作者链接 |
| copyright_url | 【可选】文章版权模块的文章连结链接 |
| copyright_info | 【可选】文章版权模块的版权声明文字 |
| mathjax | 【可选】显示mathjax(当设置mathjax的per_page: false时,才需要配置,默认 false) |
| katex | 【可选】显示katex(当设置katex的per_page: false时,才需要配置,默认 false) |
| aplayer | 【可选】在需要的页面加载aplayer的js和css,请参考文章下面的音乐 配置 |
| highlight_shrink | 【可选】配置代码框是否展开(true/false)(默认为设置中highlight_shrink的配置) |
| aside | 【可选】显示侧边栏 (默认 true) |
魔改居中
在 [BlogRoot]\source\css\custom.css中引入如下css代码,然后在主题配置文件 _config.butterfly.yml中引入该文件:
1 | /* 一级菜单居中 */ |
此处的 css实现了两个作用:菜单栏居中、子菜单横向显示。其中子菜单横向显示要根据自己的实际情况来改,例如你的以及菜单的第2个选项中有子菜单,那就要加一项调节第2个选项中的子菜单,这个具体调节多少要根据你的具体情况为准,可以自己慢慢调到中间。
此时我们的手机端子菜单默认是展开显示的
此时我们只需要在主题配置文件 _config.butterfly.yml中列表对应的地方加一个 hide即可,如下图的列表选项:
1 | menu: |
代码配置
代码高亮
Butterfly支持 6 种代码高亮样式:
- darker
- pale night
- light
- ocean
- mac
- mac light
修改主题配置文件 _config.butterfly.yml。中的 highlight_theme属性。
代码复制
修改主题配置文件 _config.butterfly.yml中的 highlight_copy属性,true表示可以复制。
代码框展开或关闭
修改主题配置文件 _config.butterfly.yml。中的 highlight_shrink属性。
在默认情况下,代码框自动展开,可设置是否所有代码框都关闭状态,点击>可展开代码。
- true 全部代码框不展开,需点击>打开
- false 代码框展开,有>点击按钮
- none 不显示>按钮
代码换行
在默认情况下,Hexo 在编译的时候不会实现代码自动换行。如果你不希望在代码块的区域里有横向滚动条的话,那么你可以考虑开启这个功能。
修改主题配置文件 _config.butterfly.yml。中的 code_word_wrap属性。
代码高度限制
可配置代码高度限制,超出的部分会隐藏,并显示展开按钮。
修改主题配置文件 _config.butterfly.yml。中的 highlight_height_limit: 属性。
- 单位是
px,直接添加数字,如 200 - 实际限制高度为
highlight_height_limit + 30 px,多增加 30px 限制,目的是避免代码高度只超出highlight_height_limit 一点时,出现展开按钮,展开没内容。 - 不适用于隐藏后的代码块( css 设置
display: none)。
文章内容复制相关配置
1 | # copy settings |
背景设置
网站背景
修改主题配置文件 _config.butterfly.yml
1 | # 图片格式 url(http://xxxxxx.com/xxx.jpg) |
如果你的网站根目录不是 '/',使用本地图片时,需加上你的根目录。
例如:网站是 https://yoursite.com/blog,引用一张 img/xx.png图片,则设置 background为 url(/blog/img/xx.png)
顶部图
如果不要显示顶部图,可直接配置 disable_top_img: true。
| 配置 | 解释 |
|---|---|
| index_img | 主页的 top_img |
| default_top_img | 默认的 top_img,当页面的 top_img 没有配置时,会显示 default_top_img |
| archive_img | 归档页面的 top_img |
| tag_img | tag子页面 的 默认 top_img |
| tag_per_img | tag子页面的 top_img,可配置每个 tag 的 top_img |
| category_img | category 子页面 的 默认 top_img |
| category_per_img | category 子页面的 top_img,可配置每个 category 的 top_img |
修改主题配置文件 _config.butterfly.yml
1 | index_img: xxx.png |
其它页面 (tags/categories/自建页面)和文章页的 top_img,请到对应的 md 页面设置 front-matter中的 top_img。 也可以是网页链接
底部背景
修改主题配置文件 _config.butterfly.yml
1 | # footer是否显示图片背景(与top_img一致) |
留空/false:显示默认的颜色图片链接:显示所配置的图片颜色包括HEX值 - #0000FF | RGB值 - rgb(0,0,255) | 颜色单词 - orange | 渐变色 - linear-gradient( 135deg, #E2B0FF 10%, #9F44D3 100%):对应的颜色true:显示跟 top_img 一样
最底部信息
1 | footer: |
魔改 一图流
在
\source文件夹下新建一个文件夹css,该文件夹用于存放自定义的css样式,再新建一个名为custom.css,在里面写入以下代码:1
2
3
4
5
6
7
8
9
10
11
12
13
14
15
16
17
18
19
20
21
22
23/* 页脚与头图透明 */
#footer {
background: transparent !important;
}
#page-header {
background: transparent !important;
}
/* 白天模式遮罩透明 */
#footer::before {
background: transparent !important;
}
#page-header::before {
background: transparent !important;
}
/* 夜间模式遮罩透明 */
[data-theme="dark"] #footer::before {
background: transparent !important;
}
[data-theme="dark"] #page-header::before {
background: transparent !important;
}在主题配置文件
_config.butterfly.yml文件中的inject配置项的head子项加入以下代码,代表引入刚刚创建的custom.css文件(这是相对路径的写法)
1 | inject: |
- 在主题配置文件
_config.butterfly.yml文件中的index_img和footer_bg配置项取消头图与页脚图的加载项避免冗余加载
1 | # The banner image of home page |
4.一图流改完了背景图没了,那大概率是你之前没设置背景图。在主题配置文件 _config.butterfly.yml文件中的 background配置项设置背景图
1 | background: url(https://npm.elemecdn.com/aboyzy_blogstatic/img/202301091557348.jpg) |
自定义字体
自定义官方字体
全局字体
修改主题配置文件 _config.butterfly.yml中的 font-family属性即可,如不需要配置,请留空。
1 | 修改主题配置文件_config.butterfly.yml中的font-family属性即可,如不需要配置,请留空。 |
Blog 标题字体
修改主题配置文件 _config.butterfly.yml中的 blog_title_font属性即可,如不需要配置,请留空。
如不需要使用网络字体,只需要把font_link留空就行。
1 | # Font settings for the site title and site subtitle |
自定义字体(魔改)
声明:非商免字体未经授权仅限个人使用,不得用于商业用途!
- 准备好字体文件后,在
[BlogRoot]\source\css\custom.css(没有就自己创建)中添加以下代码:(记得更改为自己的配置)
1 | @font-face { |
- 各个属性的定义:
- font-family属性值中使用webfont来声明使用的是服务器端字体,即设置文本的字体名称。
- src属性值中首先指定了字体文件所在的路径。
- format声明字体文件的格式,可以省略文件格式的声明,单独使用src属性值。
- font-style:设置文本样式。取值:normal:不使用斜体;italic:使用斜体;oblique:使用倾斜体;inherit:从父元素继承。
- 支持格式:.eot(老版本IE),.otf,.ttf,.woff,*.woff2(推荐)
3.在主题配置文件 _config.butterfly.yml中的 font配置项以及 blog_title_font配置项写上你刚刚引入的字体名称,系统会根据先后次序从前到后依次加载这些字体:
1 | # Global font settings |
本地搜索系统
- 安装依赖:前往博客根目录,打开cmd命令窗口执行
npm install hexo-generator-search --save
1 | npm install hexo-generator-search --save |
2.注入配置:修改站点配置文件 _config.yml,添加如下代码:
1 | search: |
3.主题中开启搜索:在主题配置文件_config.butterfly.yml中修改以下内容:
1 | local_search: |
侧边栏设置
头像
1 | avatar: |
排版
可自行决定哪个项目需要显示,可决定位置,也可以设置不显示侧边栏。
修改主题配置文件 _config.butterfly.yml,
1 | aside: |
社交图标
Butterfly支持font-awesome v6图标。
书写格式:图标名:url || 描述性文字。
1 | social: |
访问人数
1 | busuanzi: |
运行时间
1 | # Time difference between publish date and now (網頁運行時間) |
右下角按钮
简繁转换
1 | translate: |
夜间模式
1 | # dark mode |
v2.0.0 开始增加一个选项,可开启自动切换light mode 和 dark mode。
autoChangeMode: 1跟随系统而变化,不支持的浏览器/系统将按照时间晚上6点到早上6点之间切换为 dark mode。autoChangeMode: 2只按照时间 晚上6点到早上6点之间切换为 dark mode,其余时间为light mode。autoChangeMode: false取消自动切换。
阅读模式
阅读模式下会去掉除文章外的内容,避免干扰阅读。只会出现在文章页面,右下角会有阅读模式按钮。
1 | readmode: true |
杂项
图片大图查看模式
只能开启一个。
如果你并不想为某张图片添加大图查看模式,你可以使用 html 格式引用图片,并为图片添加 no-lightbox class 名,例如:<img src="xxxx.jpg" class="no-lightbox">。
修改主题配置文件 _config.butterfly.yml中 fancybox属性
1 | # fancybox http://fancyapps.com/fancybox/3/ |
打字效果
修改主题配置文件 _config.butterfly.yml
1 | # Typewriter Effect (打字效果) |
pjax
当用户点击链接,通过 ajax 更新页面需要变化的部分,然后使用 HTML5 的 pushState 修改浏览器的 URL 地址。这样可以不用重复加载相同的资源 (css/js), 从而提升网页的加载速度。
1 | # Pjax [Beta] |
文章界面
文章置顶,隐藏与封面
置顶
- 你可以直接在文章的
front-matter区域里添加sticky: 1属性来把这篇文章置顶。数值越大,置顶的优先级越大。也可用top进行置顶sticky的优先级会比top高
隐藏
使用插件 hexo-generator-index-custom
1 | npm uninstall hexo-generator-index //卸载原有渲染工具 |
在文件_config.yml中增加或修改配置(渲染配置与原来相同可查看着更改)
1 | index_generator: |
在文章开头添加 hide参数,可以隐藏文章
1 | hide: true |
- 文章的markdown文档上,在
Front-matter添加cover,并填上要显示的图片地址。如果不配置cover,可以设置显示默认的cover;如果不想在首页显示cover,可以设置为false。
修改主题配置文件_config.butterfly.yml。
1 | cover: |
当配置多张图片时,会随机选择一张作为cover,此时写法应为:
1 | default_cover: |
文章页面相关配置
文章meta显示
post_meta这个属性用于显示文章的相关信息的,修改主题配置文件 _config.butterfly.yml。
1 | post_meta: |
文章版权和协议许可
修改主题配置文件 _config.butterfly.yml
1 | post_copyright: |
由于 Hexo 4.1开始,默认对网址进行解码,以至于如果是中文网址,会被解码,可设置 decode: true来显示中文网址。如果有文章(例如:转载文章)不需要显示版权,可以在文章页 Front-matter中单独设置。
1 | copyright: false |
从 v3.0.0开始,支持对单独文章设置版权信息,可以在文章Front-matter单独设置。
1 | post_copyright: |
文章打赏
1 | reward: |
文章目录TOC
1 | toc: |
文章分页按钮
1 | # post_pagination (分页) |
文章右下角分享链接
1 | sharejs: |
魔改
外挂标签的引入
安装插件,在博客根目录
[BlogRoot]下打开终端,运行以下指令:1
npm install hexo-butterfly-tag-plugins-plus --save
虑到hexo自带的markdown渲染插件 hexo-renderer-marked与外挂标签语法的兼容性较差,建议您将其替换成hexo-renderer-kramed
1 | npm uninstall hexo-renderer-marked --save |
- 添加配置信息,以下为写法示例
在站点配置文件_config.yml或者主题配置文件_config.butterfly.yml中添加
1 | # tag-plugins-plus |
- 参数释义
| 参数 | 备选值/类型 | 释义 |
|---|---|---|
| enable | true/false | 【必选】控制开关 |
| priority | number | 【可选】过滤器优先级,数值越小,执行越早,默认为10,选填 |
| issues | true/false | 【可选】issues标签控制开关,默认为false |
| link.placeholder | 【必选】link卡片外挂标签的默认图标 | |
| CDN.anima | URL | 【可选】动画标签anima的依赖 |
| CDN.jquery | URL | 【可选】issues标签依赖 |
| CDN.issues | URL | 【可选】issues标签依赖 |
| CDN.iconfont | URL | 【可选】iconfont标签symbol样式引入,如果不想引入,则设为false |
| CDN.carousel | URL | 【可选】carousel旋转相册标签鼠标拖动依赖,如果不想引入则设为false |
| CDN.tag_plugins_css | URL | 【可选】外挂标签样式的CSS依赖,为避免CDN缓存延迟,建议将@latest改为具体版本号 |
aplayer音乐播放器
安装依赖
1
npm install --save hexo-tag-aplayer
使用
由於需要全局都插入 aplayer 和 meting 資源,為了防止插入重複的資源,需要把 asset_inject 設為 false
在 Hexo 的配置文件中
1
2
3aplayer:
meting: true
asset_inject: false开启主題的 aplayerInject
1
2
3
4# Inject the css and script (aplayer/meting)
aplayerInject:
enable: true
per_page: true插入 Aplayer html
<div class="aplayer no-destroy" data-id="60198" data-server="netease" data-type="playlist" data-fixed="true" data-autoplay="true"> </div>把 aplayer代碼 插入到主題配置文件的 inject.bottom 去
1 | - <div class="aplayer no-destroy" data-id="7552069168" data-server="netease" data-type="playlist" data-fixed="true" data-mini="true" data-listFolded="false" data-order="random" data-lrctype="1" data-preload="none" data-autoplay="true" muted></div> |
bilibili视频部署
- 在
source\css\custom.css自定义样式的文件中引入如下代码(这是我的,你可以自行微调):
1 | /*哔哩哔哩视频适配*/ |
- 直接复制插入你的
md文章就行,修改里面的aid为你视频的AV号:
1 | <div align=center class="aspect-ratio"> |
文章H1~H6标题小风车转动效果
- 修改主题配置文件
_config.butterfly.yml文件的beautify配置项:
1 | beautify: |
\source\css\custom.css中加入以下代码,可以自己调节一下转速:
1 | /* 文章页H1-H6图标样式效果 */ |
挂绳小猫咪
- 制作一个盛放内容的盒子,在
根目录/node_modules/hexo-theme-butterfly/layout/includes/head.pug(如果是git clone安装在根目录/themes/butterfly/layout/includes/head.pug)最后一行加入如下代码:
1 | #myscoll |
其实随便放在哪里都行,只要能加载出来就行
- 在
[BlogRoot]/node_modules/hexo-theme-butterfly/source/js文件夹下新建一个cat.js,将以下代码复制到文件中。
1 | if (document.body.clientWidth > 992) { |
- 在
[BlogRoot]/node_modules/hexo-theme-butterfly/source/css文件夹下新建一个cat.css,将以下代码复制到文件中。当然你也可以选择不新建 css 文件,复制代码到custom.css也行,总之有地方引入就行。
1 | body::-webkit-scrollbar { |
- 在主题配置文件
_config.butterfly.yml中引入cat.js和cat.css,当然还有在bottom的最前面引入jQuery,因为cat.js的语法依赖jQuery。
1 | inject: |
Twikoo评论系统部署(Vercel方式)
twikoo安装
参考文字教程:
视频教程:
通用配置(一定要配置)
从3.0.0开始,开启评论需要在comments-use中填写你需要的评论,这里参照你主题版本的格式写。
支持双评论显示,只需要配置两个评论(第一个为默认显示)
1 | comments: |
配置
1 | twikoo: |
twikoo配置
- 评论框提示信息
在名称框输入QQ账号会自动获取邮箱和名称,邮箱和名称为必填项<br> 本站已开启邮件回复,请确保填入的邮箱有效
邮箱提醒配置
MAIL_TEMPLATE
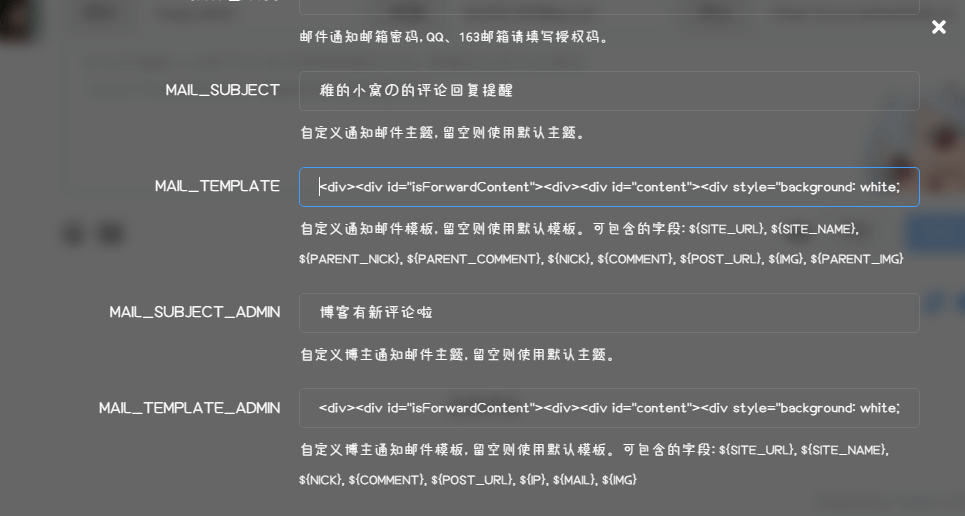
1 | <div><div id="isForwardContent"><div><div id="content"><div style="background: white;width: 95%;max-width: 800px;margin: auto auto; border-radius: 15px; border: #39c5bb 1px solid; overflow: hidden; -webkit-box-shadow: 0px 0px 20px 0px rgba(0, 0, 0, 0.12); box-shadow: 0px 0px 20px 0px rgba(0, 0, 0, 0.18); "><header style="overflow: hidden"><img src="https://npm.elemecdn.com/aboyzy_blogstatic/img/202301071813681.png" style="width: 100%; z-index: 666" /></header><div style="padding: 5px 20px;background-color: #46e1c60d"><div class="dear" style=" border-radius: 30px; position: relative; color: white; float: left; z-index: 999; background: #39c5bb; padding: 10px 30px; margin: -25px auto 0; box-shadow: 5px 5px 5px rgba(0, 0, 0, 0.3); ">亲爱的 ${PARENT_NICK} 同学:</div><br /><center><h3>来自 <strong>${NICK}</strong> 的回复</h3></center><hr style="width:200px;border:0;border-bottom:1px solid #e5e5e5;margin:12px auto;" /><br /><p>您好!您在 <a href="${POST_URL}" style="text-decoration: none; color: #39c5bb" target="_blank"> ${SITE_NAME} </a>上发表的评论:</p><div class="tk-content" style="border-radius: 8px;border: 1px solid #ddd; padding-bottom: 20px; background-color: #f5f5f5; margin: 15px 0px; padding-left: 20px; padding-right: 20px; padding-top: 20px;">${PARENT_COMMENT}</div><p><strong>${NICK}</strong> 给您回复啦: </p><div class="tk-content" style="border-radius: 8px;border: 1px solid #ddd; padding-bottom: 20px; background-color: #f5f5f5; margin: 15px 0px; padding-left: 20px; padding-right: 20px; padding-top: 20px; ">${COMMENT}</div><p>欢迎经常来玩啊: <a style="text-decoration:none; color:#39c5bb" href="${SITE_URL}" target="_blank">${SITE_NAME}</a></p><p>(此邮件由系统发出,支持直接回复)</p><div class="chakan" style="text-align: center;"><a href="${POST_URL}" style="color:#ffffff;text-decoration:none;display:inline-block;min-height:28px;line-height:28px;padding:0 13px;outline:0;background:#39c5bb;font-size:13px;text-align: center;font-weight:400;border:0;border-radius:999em" target="_blank">点击去原文查看>></a><p></p></div><div class="footer-p" style="text-align: center; margin-top: 3rem; display:block;color:#b3b3b1;text-decoration:none;"><img src="https://npm.elemecdn.com/aboyzy_blogstatic/img/202301070538463.png" style="width:5rem; margin:0 auto;border-radius: 5px;" /> <hr style="width:165px;border:0;border-bottom:1px solid #e5e5e5;margin:5px auto;" />© 2022-2023 By <a href="https://azhezhezhe.com/" style="text-align:center; color: #39c5bb;text-decoration: none;font-weight: bold" target="_blank">zy</a><p></p></div></div></div></div></div><br /></div><style type="text/css"> .qmbox ::-webkit-scrollbar { display: none; } </style><style id="cloudAttachStyle" type="text/css"> .qmbox #divNeteaseBigAttach, .qmbox #divNeteaseBigAttach_bak { display: none; } </style><style id="blockquoteStyle" type="text/css"> .qmbox blockquote { display: none; } </style><style type="text/css"> .qmbox body { font-size: 14px; font-family: arial, verdana, sans-serif; line-height: 1.666; padding: 0; margin: 0; overflow: auto; white-space: normal; word-wrap: break-word; min-height: 100px; } .qmbox td, .qmbox input, .qmbox button, .qmbox select, .qmbox body { font-family: Helvetica, 'Microsoft Yahei', verdana; } .qmbox pre { white-space: pre-wrap; white-space: -moz-pre-wrap; white-space: -pre-wrap; white-space: -o-pre-wrap; word-wrap: break-word; width: 95%; } .qmbox th, .qmbox td { font-family: arial, verdana, sans-serif; line-height: 1.666; } .qmbox img { border: 0; } .qmbox header, .qmbox footer, .qmbox section, .qmbox aside, .qmbox article, .qmbox nav, .qmbox hgroup, .qmbox figure, .qmbox figcaption { display: block; } .qmbox blockquote { margin-right: 0px; } </style><style type="text/css"> @media screen and (max-width: 1100px) {#content p {font-size: 10px;} #content h3 {font-size: 14px;} .footer-p {font-size: 9px;} .dear {font-size: 12px;}} </style><style id="ntes_link_color" type="text/css"> .qmbox a, .qmbox td a { color: #236da1; } </style></div></div> |
MAIL_TEMPLATE_ADMIN
1 | <div><div id="isForwardContent"><div><div id="content"><div style="background: white;width: 95%;max-width: 800px;margin: auto auto; border-radius: 15px; border: #39c5bb 1px solid; overflow: hidden; -webkit-box-shadow: 0px 0px 20px 0px rgba(0, 0, 0, 0.12); box-shadow: 0px 0px 20px 0px rgba(0, 0, 0, 0.18); "><header style="overflow: hidden"><img src="https://npm.elemecdn.com/aboyzy_blogstatic/img/202301071813681.png" style="width: 100%; z-index: 666" /></header><div style="padding: 5px 20px;background-color: #46e1c60d"><div class="dear" style=" border-radius: 30px; position: relative; color: white; float: left; z-index: 999; background: #39c5bb; padding: 10px 30px; margin: -25px auto 0; box-shadow: 5px 5px 5px rgba(0, 0, 0, 0.3); ">亲爱的站长:</div><br /><center><h3>来自 <strong>${NICK}</strong> 的评论</h3></center><hr style="width:200px;border:0;border-bottom:1px solid #e5e5e5;margin:12px auto;" /><br><p> 您好!系统得知 <strong>${NICK}</strong> 刚刚在您的网站发表评论: </p><div class="tk-content" style="border-radius: 8px;border: 1px solid #ddd; padding-bottom: 20px; background-color: #f5f5f5; margin: 15px 0px; padding-left: 20px; padding-right: 20px; padding-top: 20px; ">${COMMENT}</div><p>特地通知您,快去看看吧!</p><div class="chakan" style="text-align: center;"><a href="${POST_URL}" style="color:#ffffff;text-decoration:none;display:inline-block;min-height:28px;line-height:28px;padding:0 13px;outline:0;background:#39c5bb;font-size:13px;text-align: center;font-weight:400;border:0;border-radius:999em" target="_blank">点击去原文查看>></a><p></p></div><div class="footer-p" style="text-align: center; margin-top: 3rem; display:block;color:#b3b3b1;text-decoration:none;"><img src="https://npm.elemecdn.com/aboyzy_blogstatic/img/202301070538463.png" style="width:5rem; margin:0 auto;border-radius: 5px;" /> <hr style="width:165px;border:0;border-bottom:1px solid #e5e5e5;margin:5px auto;" />© 2022-2023 By <a href="https://azhezhezhe.com/" style="text-align:center; color: #39c5bb;text-decoration: none;font-weight: bold" target="_blank">zy</a><p></p></div></div></div></div></div><br /></div><style type="text/css"> .qmbox ::-webkit-scrollbar { display: none; } </style><style id="cloudAttachStyle" type="text/css"> .qmbox #divNeteaseBigAttach, .qmbox #divNeteaseBigAttach_bak { display: none; } </style><style id="blockquoteStyle" type="text/css"> .qmbox blockquote { display: none; } </style><style type="text/css"> .qmbox body { font-size: 14px; font-family: arial, verdana, sans-serif; line-height: 1.666; padding: 0; margin: 0; overflow: auto; white-space: normal; word-wrap: break-word; min-height: 100px; } .qmbox td, .qmbox input, .qmbox button, .qmbox select, .qmbox body { font-family: Helvetica, 'Microsoft Yahei', verdana; } .qmbox pre { white-space: pre-wrap; white-space: -moz-pre-wrap; white-space: -pre-wrap; white-space: -o-pre-wrap; word-wrap: break-word; width: 95%; } .qmbox th, .qmbox td { font-family: arial, verdana, sans-serif; line-height: 1.666; } .qmbox img { border: 0; } .qmbox header, .qmbox footer, .qmbox section, .qmbox aside, .qmbox article, .qmbox nav, .qmbox hgroup, .qmbox figure, .qmbox figcaption { display: block; } .qmbox blockquote { margin-right: 0px; } </style><style type="text/css"> @media screen and (max-width: 1100px) {#content p {font-size: 10px;} #content h3 {font-size: 14px;} .footer-p {font-size: 9px;} .dear {font-size: 12px;}} </style><style id="ntes_link_color" type="text/css"> .qmbox a, .qmbox td a { color: #236da1; } </style></div></div> |
评论表情包放大(Leonus)
- 新建文件
[BlogRoot]\source\js\emoji.js,写入如下内容:
1 | // 如果当前页有评论就执行函数 |
- 新建文件
[BlogRoot]\source\js\emoji.css,写入如下内容(更推荐全部写在custom.css):
1 | #owo-big { |
- 引入
css和js文件,
评论输入提醒(Leonus)
实现很简单,纯css实现,在 custom.css内添加如下样式:
1 | /* 设置文字内容 :nth-child(1)的作用是选择第几个 */ |
博客统计
文章加密插件
详见开源地址:hexo-blog-encrypt
在根目录执行以下命令
1
npm install --save hexo-blog-encrypt
Front matter配置方法
1 | --- |
配置文件
[BlogRoot]\_config.yml中针对tags的加密1
2
3
4
5
6
7
8
9
10# Security
encrypt: # hexo-blog-encrypt
abstract: 有东西被加密了, 请输入密码查看.
message: 您好, 这里需要密码.
tags:
- {name: tagName, password: 密码A}
- {name: tagName, password: 密码B}
theme: xray
wrong_pass_message: 抱歉, 这个密码看着不太对, 请再试试.
wrong_hash_message: 抱歉, 这个文章不能被校验, 不过您还是能看看解密后的内容.你可以在线挑选你喜欢的主题,并应用到你的博客中:
- 安装hexo-pdf插件
1 | npm install hexo-pdf --save |
外挂标签的引用格式如下:
1
2
3
4# 1.本地文件:在md文件路径下创建一个同名文件夹,其内放pdf文件名为xxx.pdf的文件
{% pdf xxx.pdf %}
# 2.在线链接
{% pdf https://cdn.jsdelivr.net/gh/Justlovesmile/CDN/pdf/小作文讲义.pdf %}
控制台样式自定义(安知鱼)
ASCII字符画生成器见这篇文章:CSDN:在线生成ascii字符画网站字符图案在线生成工具
- 新建js文件
\source\js\console.js,并写入如下代码:
1 | var now1 = new Date(); |
- 在主题配置文件
[BlogRoot]\_config.butterfly.yml中引入该js文件
1 | inject: |
网站恶搞标题
- 新建文件
[BlogRoot]\source\js\title.js,写入以下内容:
1 | //动态标题 |
- 在主题配置文件
_config.butterfly.yml引入该文件:
1 | inject: |
直达底部
在 [BlogRoot]\themes\butterfly\layout\includes\rightside.pug做以下修改:
1 | button#go-up(type="button" title=_p("rightside.back_to_top")) |
其他
aplayer左下角缩小
1 | /* 音乐播放器 */ |
seo 引入
配置文章链接转数字或字母
参考: https://github.com/rozbo/hexo-abbrlink
安装依赖
1 | npm install hexo-abbrlink --save |
修改 config.yml
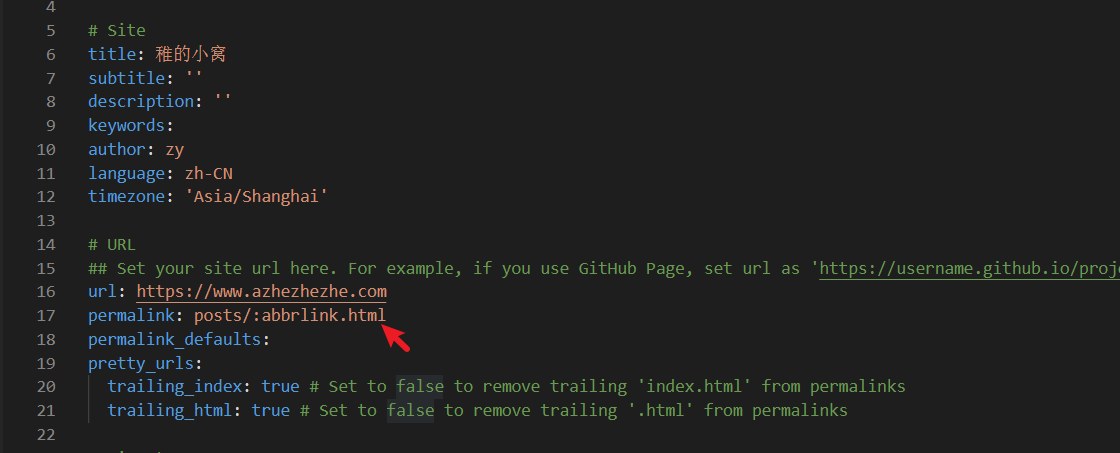
修改permalink
1 | permalink: posts/:abbrlink.html |
在最下边添加
1 | # abbrlink config |
使用 Github Action 实现全自动部署
每次部署 Hexo 都需要运行指令三件套,随着文章越来越多,编译的时间也随之越来越长,通过 Github Action,我们只需要在每次完成博客的编写或修改以后,将改动直接 push 到远程仓库,之后的编译部署的工作统统交给 CI 来完成即可
因为 node_modules文件夹默认要不上传所以如果你改了主题文件里的配置的话会被重置不显示
这时候我们要把 node_modules文件夹内的主题文件hexo-theme-butterfly复制到/themes文件夹内重命名为butterfly
配置token
为了确保交由 Github Action来持续部署时,Github Action 具备足够的权限来进行 hexo deploy 操作,需要先获取 Token。
访问 Github->头像(右上角)->Settings->Developer Settings->Personal access tokens->generate new token,创建的 Token 名称随意,但必须勾选 repo 项 和 workflows 项。
token 只会显示这一次,之后将无法查看,所以务必保证你已经记录下了 Token。之后如果忘记了就只能重新生成重新配置了。
创建存放源码的私有仓库
我们需要创建一个用来存放 Hexo 博客源码的
私有仓库
[name]名称随意,这点在 Hexo 博客搭建教程中有提到。创建完成后,需要把博客的源码 push 到这里。首先获取远程仓库地址,此处虽然 SSH 和 HTTPS 均可。SSH 在绑定过 ssh key 的设备上无需再输入密码,HTTPS 则需要输入密码,但是 SSH 偶尔会遇到端口占用的情况。请自主选择。
这里之所以是私有仓库,是因为在接下来的配置中会用到 Token,如果 Token 被盗用,别人可以肆意操作你的 github 仓库内容,为了避免这一风险,才选择的博客源码闭源。
配置 Github Action
- 在
/新建.github文件夹,注意开头是有个.的。然后在.github内新建workflows文件夹,再在workflows文件夹内新建autodeploy.yml,在/.github/workflows/autodeploy.yml里面输入
1 | name: 自动部署 |
在 token处填写自己的token 在repository-name处填写博客的GitHub用户名/Github仓库名
删除或者先把
[Blogroot]/themes/butterfly/.git移动到非博客文件夹目录下,原因是主题文件夹下的.git文件夹的存在会导致其被识别成子项目,从而无法被上传到源码仓库。在博客根目录
[Blogroot]路径下运行指令1
2
3
4
5git init #初始化
git remote add origin git@github.com:[GithubUsername]/[SourceRepo].git #[SourceRepo]为存放源码的github私有仓库
git checkout -b main # 切换到master分支,
#2020年10月后github新建仓库默认分支改为main,注意更改
# 如果不是,后面的所有设置的分支记得保持一致添加屏蔽项
因为能够使用指令进行安装的内容不包括在需要提交的源码内,所有我们需要将这些内容添加到屏蔽项,表示不上传到 github 上。这样可以显著减少需要提交的文件量和加快提交速度。打开
[Blogroot]/.gitignore,输入以下内容:1
2
3
4
5
6
7
8
9
10.DS_Store
Thumbs.db
db.json
*.log
node_modules/
public/
.deploy*/
.deploy_git*/
.idea
themes/butterfly/.git
如果不是 butterfly主题,记得替换最后一行内容为你自己当前使用的主题。
之后再运行 git 提交指令,将博客源码提交到 github 上。
1
2
3
4git add .
git commit -m "github action update"
git push origin main
#2020年10月后github新建仓库默认分支改为main,注意更改
添加屏蔽项
因为能够使用指令进行安装的内容不包括在需要提交的源码内,所有我们需要将这些内容添加到屏蔽项,表示不上传到 github 上。这样可以显著减少需要提交的文件量和加快提交速度。
打开[Blogroot]/.gitignore,输入以下内容:1
2
3
4
5
6
7
8
9
10.DS_Store
Thumbs.db
db.json
*.log
node_modules/
public/
.deploy*/
.deploy_git*/
.idea
themes/butterfly/.git如果不是 butterfly 主题,记得替换最后一行内容为你自己当前使用的主题。 2.提交源码到私有仓库
[name]
在博客根目录下启动终端,使用 git 指令重设仓库地址。这样在新建仓库,我们仍旧可以保留珍贵的 commit history,便于版本回滚。1
2
3
4
5
6
7
8
9git remote rm origin # 删除原有仓库链接
git remote add origin git@github.com:[GithubUsername]/[SourceRepo].git #[SourceRepo]为新的存放源码的github私有仓库
git checkout -b main # 切换到main分支,
#2020年10月后github新建仓库默认分支改为main,注意更改
# 如果不是,后面的所有设置的分支记得保持一致
git add .
git commit -m "github action update"
git push origin main
#2020年10月后github新建仓库默认分支改为main,注意更改- 可能遇到的 bug
因为 butterfly 主题文件夹下的.git 文件夹的存在,那么主题文件夹会被识别子项目。从而无法被上传到源码仓库。若是遇到添加屏蔽项,但是还是无法正常上传主题文件夹的情况。请先将本地源码中的 themes 文件夹移动到别的目录下。然后 commit 一次。接着将 themes 文件夹移动回来,再 commit 一次。
- 可能遇到的 bug
查看部署情况
此时,打开 GIthub 存放源码的私有仓库,找到 action
根据刚刚的 Commit 记录找到相应的任务
点击 Deploy 查看部署情况
若全部打钩,恭喜你,你现在可以享受自动部署的快感了
文章到这里基本上就结束了,如果后序还有什么魔改的我会加上去
这里感谢Fomalhaut🥝 和安知鱼 - 生活明朗 万物可爱 大佬提供的教程参考